Applications: Material Analysis
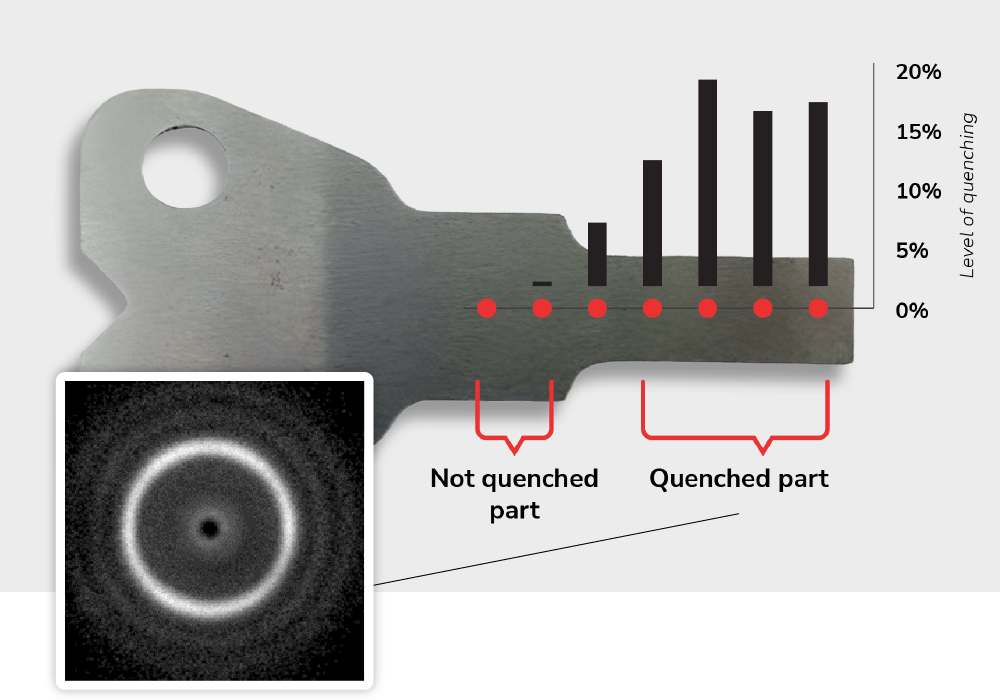
Quenching alters the inner structure of a metal, leading to improved mechanical properties. Inspecting a quenched material with X-ray diffraction can provide valuable information about the effectiveness of the process, the presence of different phases, residual stresses, and crystallographic textures, helping to optimize material properties.
Traditional X-ray Diffraction methods employed for quenching inspection use low-energy monochromatic X-rays that cannot penetrate the sample volume. This way, just the sample surface is inspected. To inspect the material’s volume, harder X-ray radiation is necessary. Utilizing our energy-sensitive detectors, we can measure the X-ray wavelength, eliminating the need for monochromatic X-rays. Through software post-processing, a diffractogram image of the entire volume can be generated. Simultaneously, our method is approximately 100 times faster, as it takes advantage of the full spectrum.
In the context of quenching or weld inspection, we can determine the crystallographic structure of the metallic sample throughout its entire depth. XRD can identify various phases present in the quenched material, such as retained austenite, martensite, or precipitates, allowing for an assessment of the quenching process’s effectiveness and optimization of heat treatment parameters. Quenching can induce preferred orientations or “textures” within the material’s crystal structure. XRD can characterize these textures, significantly impacting the material’s mechanical properties and performance.


